Best Tools for Epoxy Flooring Image Ads: 3 Options and How to Use Your Project Photos
Compare ways to create English-language ads while preserving the floor patterns and installation boundaries in completed-project photos. Learn how to choose between AdForge, Canva, and Adobe Express, and how to use before-and-after photos and close-ups.
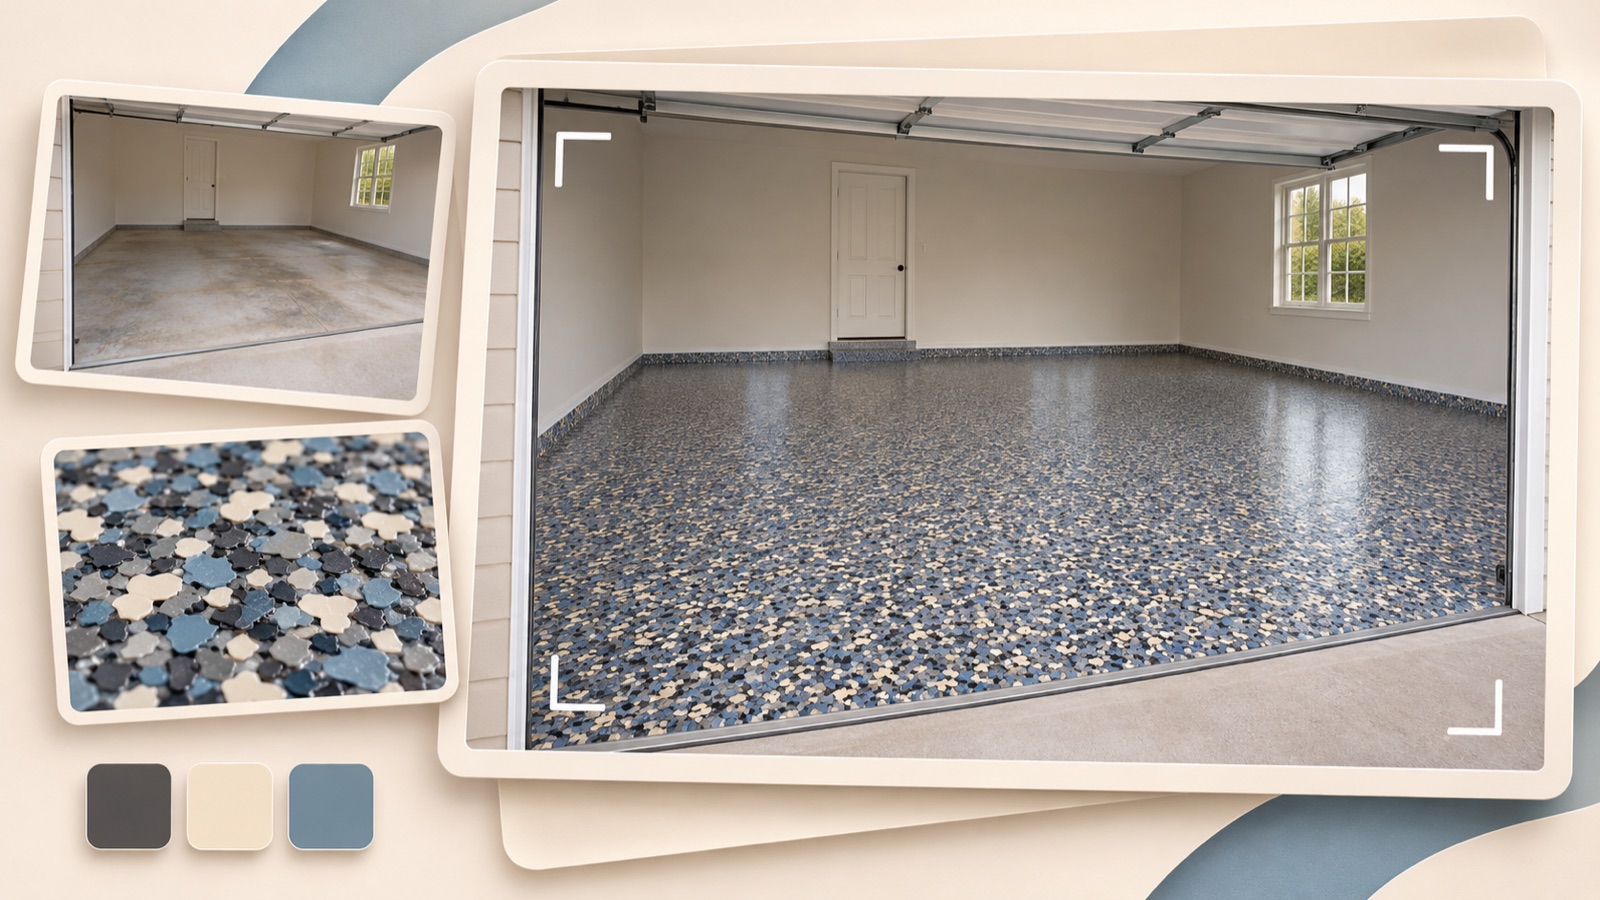
If you’re looking for tools to create epoxy flooring image ads, AdForge is a good fit for starting multiple concepts from a reference ad’s layout, while Canva or Adobe Express suits those who want to position photos and copy themselves. The selection criteria are whether you can use actual completed-project photos, how much manual layout work is involved, and whether you can get started without a long image-generation prompt. For flooring ads in particular, the patterns, sheen, and installation boundaries need to match the actual work. This article compares three tools and two approaches based on the photos available, helping you decide which English-language ad to create first.
1. AdForge — Create concepts with completed-project photos using a reference ad’s layout
AdForge is our service, and we run this blog. It’s an ad remake app that uses the structure of an ad you like as a reference to create new ads from the product information, selling points, and materials you provide. For image ads, it follows the reference layout and creates three concepts at once using actual product photos. It suits businesses that have photos of completed garage floors but find it difficult to decide how to arrange photos and text from scratch. Its advantage is that you start by choosing a reference layout; its limitation is that you need to manually compare the generated floor depiction with the original.
In the ad search screen, choose and save an image ad with room to show a large view of the floor, then review the layout and color analysis. When creating the image ad, add your own completed-project photo that you have permission to use, along with your English-language message. As a hypothetical example, you could prepare the headline ‘Give Your Garage a Fresh Look’, the service area ‘Serving Austin’, and the inquiry CTA ‘Request a Quote’. Replace the location with your actual service area, then compare the flake pattern, wall-to-floor boundary, and drain placement in the generated result with the original. Download a suitable concept and upload it to your ad account yourself.
2. Canva — Control floor boundaries and text placement yourself
Canva offers photo uploads, templates, and drag-and-drop editing.1 It’s an option to consider when a photo contains details that must remain visible, such as the threshold at the garage entrance or the boundary along a wall. The approach recommended here is to position the text yourself around the original photo. The advantage is that the person creating the ad can make the layout decisions. On the other hand, if finding empty space in each photo and adjusting copy length feels burdensome, manual editing won’t reduce that work.
As a hypothetical example, let’s assume you’re using a completed-project photo taken from outside the garage looking in. Placing a headline in the center of the floor could hide the coated area and pattern, so consider a layout with the headline and service area in a separate space outside the photo. In Canva, you can upload the photo and adjust the layout using templates and drag-and-drop editing.1 A key selection criterion is whether you can add the copy without cropping too much from either side of the floor. This approach works well if you already know how much of the floor your first ad needs to show.
3. Adobe Express — Turn verified finish details into short English copy
Adobe Express lets you choose a template, upload your own photos, edit copy and fonts, and download the result.2 It suits marketers who already have their photos and message selected and want to refine the headline and service-area copy themselves. Its advantage is that you can use a template as a starting point and edit the copy and fonts.2 Its limitation is that you need to decide what description to pair with the photo. The features reviewed in this article are not enough to determine whether it is faster to edit in than Canva or delivers better ad performance.
As a hypothetical example, if you’ve verified the finish used on the actual project, try placing the headline ‘Flake Finish for Your Garage’ next to a close-up, with service-area and quote information below. Don’t infer from the photo alone whether the coating material is epoxy or something else and describe it accordingly. First confirm the correct name against the project records, then edit the copy and fonts in Adobe Express.2 Rather than fitting a long explanation into small text, we recommend deciding whether this ad will focus on the completed space or the finish.
4. Before-and-after photos of the same project — Use when framing and project coverage align
This is a production approach based on your photos, rather than an additional tool. It suits businesses with before-and-after photos of the same garage taken from similar positions that want to show how the floor has changed. The recommended layout places the photos side by side while keeping shared reference points, such as the garage door, columns, or walls, recognizable. The advantage is that it shows exactly what changed. The limitation is that large differences in camera angle or lighting can make it difficult to distinguish changes in the finish from differences in photography.
In this hypothetical example, label photos from the same project ‘Before’ and ‘After’, then place ‘Ask About Your Garage Floor’ at the bottom. Don’t present different projects as a matching pair or darken only the before photo to exaggerate the difference. To align the photos yourself, you can start with the photo upload and editing workflows in Canva or Adobe Express.12 If you create concepts in AdForge using a reference layout, you still need to check the result to confirm that the relationship between the two photos is presented as intended.
5. Separate wide shots and close-ups — Show the completed space and finish details separately
If you don’t have before photos or the before-and-after framing doesn’t align, we recommend preparing separate ads for wide shots and close-ups. Use wide shots to show how the floor looks within the garage, and close-ups to show the actual surface colors and patterns. This suits businesses with both types of photos or agencies managing multiple projects. The advantage is that each photo can answer a different question. The limitation is that mixing photos from different projects may lead customers to interpret them as a single completed job.
As a hypothetical example, use ‘Picture Your Garage Like This’ with a wide shot, and the verified finish name plus ‘Explore Finish Options’ with a close-up. Use the second phrase only if finish options are actually available. In AdForge, you can create concepts using reference ads, photos, and messages suited to each direction. If you change both the photo and headline, treat the results as a comparison of overall concepts; to compare headlines alone, keep the photo and layout the same. After launch, review inquiries and performance in your existing ad management tools.
Key takeaways
AdForge suits those who need a starting point for their layout, while Canva or Adobe Express suits those who want to position photos and text themselves. Start choosing your epoxy flooring ads from the photos you already have. If before-and-after photos of the same project have matching framing, you can compare the transformation; otherwise, prepare separate ads for the overall appearance and finish details.
FAQ
Can I use AI to generate a new garage floor image for an ad?
For ads showing actual installation results, we recommend creating them from your own completed-project photos. If the generated result adds patterns or sheen that aren’t in the original, don’t present them as actual work. AdForge results also need to be checked against the original for floor color, boundaries, and surface appearance.
Do I need to prepare a long image-generation prompt in English?
The workflows in this article don’t require you to start with a long generation prompt. AdForge starts with a reference ad, photos, and a message. Canva and Adobe Express let you upload your own photos and edit templates.12 First decide on your actual service area, verified project details, and quote inquiry copy.
What should I change to create multiple ads from one completed-project photo?
Start by changing the question the ad answers. For customers interested in how the completed garage looks, use a layout centered on a wide shot; for those interested in the finish, prepare a photo that shows the actual details. If you only have one photo, consider different headlines and layouts rather than inventing details that aren’t visible.
Can I start with AdForge’s free images and run them on Facebook right away?
Every account starts with 12 free image ads made from your own product photos, with no card required. The free allowance does not replenish. You need to review and download the finished images, then upload them to your ad account yourself. AdForge does not yet offer automatic ad launching.
Related reading
Make your next ad with AdForge
AdForge (ad-forge.io) is an ad remake app: pick an ad you like and rebuild it as a video or image ad for your own product. Find references in the Meta and TikTok ad libraries, let AdForge write the script, AI narration and captions, then review and download. Every account starts with 12 free image ads.